Wednesday, December 21, 2011

Glad Tidings We Bring...

Hi everyone,

I managed to get an electronic copy of our Christmas card! Here it is:


Merry Christmas from all of us (Molly included)! :)

I ordered 40 of these through Walgreens (the design I chose is called "Posh Paper Merry Moods"), and they only came to around $40 with shipping, which is super cheap for Christmas cards. Plus they came with envelopes, and they were matte prints. I did a lot of online searching for cards, and my favorite stationary site I found is Tiny Prints. They're more expensive, but not totally unreasonable, and they have really cute, modern designs. Definitely an option I will keep in mind for the future. Another site I loved is Pear Tree Greetings. Their prices are actually very reasonable - close to Walgreens' - and their designs are beautiful. The only reason I chose Walgreens over them is because I could fit more photos on this card. :)

{Edit: I just discovered the best iPhone app EVER for Christmas photos... I wish I had known about this a couple weeks ago! It's called Red Stamp. The designs are awesome, you can add a photo straight from your phone or even from Instagram or one of your Facebook albums, and you can send the cards via regular mail, email, text message and/or post them onto Facebook and Twitter. SO COOL. I'm making some just for fun to text to people!}

In other (related) news, Mr. G and I are driving down to Nashville on Friday for Christmas! We'll be bringing back some of my stuff (ie: mattress for the guest bedroom) since it's our first opportunity to finally do so. The only downside is that Mr. G has some pretty severe back pain, which doesn't bode well for a long road trip. I may be doing most of the driving. Also good timing - poor Molly has diarrhea. She woke us up at 4 am this morning with an early Christmas gift that took us 30 minutes to clean up. It was lovely. The good news is that all of our actual presents have been purchased and wrapped and are currently sitting under our tree! Can't wait to be back in my childhood home with my family, my husband and my pup around me - I can't imagine anything better. :)

You probably won't hear from me again until after the weekend, so I hope you all have a wonderful Christmas! Wishing you safe travels and many blessings.

<3 Mrs. G

Sunday, December 11, 2011

New Christmas Favorites: DIY Decor & Cake Balls

If you read my previous post, then you're aware that I spent the little free time I had last week making DIY Christmas decorations for our Christmas party on Saturday. See my last post for my inspiration (via Pinterest, of course). Here are my final products:


Styrofoam cone + floral pins + LOTS of ribbon!


Tall vase + fresh cranberries and dill + floating candle


Mason jar + Epsom salt + small candle + twine

Free Christmas printable from this blog that I found on Pinterest

I also made my spinach dip (my favorite go-to party dip), Pillsbury Christmas cookies (so easy...) and, for the first time, cake balls! I've been wanting to make them ever since they started popping up all over the internet. I ate them on Thanksgiving for the first time and they looked easy to make. Since I didn't have enough time to whip up a batch of homemade cupcakes for the party - plus I had yellow cake mix leftover from apple crisp - I thought I would give these a try. They turned out to be pretty simple, but having the sticks to go in them (a la cake pops) would have been better, since toothpicks are too small and flimsy for dipping, and barbecue skewers are too fat and just look ridiculous (yes, I tried them). I know there are a lot of ways to make these, but here's how I did it:

Chocolate Cake Balls

Ingredients:
  • Betty Crocker SuperMoist yellow cake mix (I used half a box, which was enough for a 9x9 pan and 18 large cake balls) - see back of box for remaining cake ingredients
  • Vanilla buttercream frosting (from my 200 Cupcakes book - I made half):
    • 10 tbsp unsalted butter, softened
    • 2 cups confectioners' sugar
    • 1 tsp vanilla extract
    • 2 tsp hot water
  • 2 bags semi-sweet chocolate chips
  • Sprinkles to decorate
Directions:
  • Bake cake according to box directions - in a 9x13 pan for a full box and a 9x9 pan for half a box.
  • Make frosting while allowing cake to cool. I made vanilla buttercream, but I've heard cream cheese is really good, too. If you're short on time, just use a half-tub of store-bought frosting.
  • When cake is cooled, crumble all of it into a large mixing bowl. Add frosting and mix together so that it's mushy.
  • Roll little balls from cake-frosting mixture and place on wax paper or foil.
  • Heat chocolate chips in microwave, mixing every 30 seconds until smooth and creamy. If necessary, add some hot water to make the consistency thinner (I did this).
  • Dip cake balls into chocolate, coat evenly, and place back on paper/foil. Use sticks if you have them. If not, just drop the cake balls in and use a spoon to cover them with chocolate. Toothpicks didn't work for me because of the thickness of the chocolate, but they may work for other toppings.
  • If you want, add sprinkles as you finish coating each cake ball with chocolate.
  • When finished, place them (covered) in the fridge to sit. Serve and enjoy!


If you're a visual learner, here's a helpful video I found on YouTube for making cake balls.

If you have any delicious cake ball/pop recipes, please feel free to comment and share! These might be my newest obsession... :)

Now, time to watch Love Actually and drink some egg nog (another favorite) after a day of Christmas shopping at the Mall of America - yes, we braved it. Good luck with all of your shopping/crafting/baking/traveling this holiday season! Lots of love from snowy Minnesota. ;)

<3 Mrs. G

P.S. Our Christmas cards came in this week! If I can figure out how to upload them on here, I'll show you what they look like. I actually ended up buying them through Walgreens because I could fit a lot of our cute Christmas photos into one card. :)

Monday, December 5, 2011

Have Yourself a Crafty Little Christmas...

As I mentioned in my last post, my focus this week is on DIY Christmas decor. I'm on a bit of a tight schedule, because Mr. G and I are having friends over to our house this Saturday for a Christmas party, so I want my halls to be decked and ready by then. We've already got our tree up - as you may have seen in my last post - as well as our stockings, Christmas lights on the deck, a berry wreath on the door, some holiday-scented candles, and a couple nutcrackers from my vast collection. But that's about it. It was enough to fill up our tiny apartment in Connecticut last year (let's be honest, the tree pretty much filled the apartment), but our townhome requires a little more TLC to look merry and bright. Instead of paying $200 for Christmas decorations from Target, I decided to try making some myself for cheaper (surprised?). Even less surprising, I drew all my inspiration from my favorite website - Pinterest.

Here are my thrifty muses:
  

Snow Candles using Epsom salt! I added twine around the top. 


Ribbon Tree
 

Berry Garland Centerpiece

Cranberries in a Mason jar

 As for my progress, I finished the snow candles, I'm halfway done with one of my two ribbon trees (until I ran out of ribbon), and I put together the vase with the berry garland, but the berries were fake and apparently not waterproof... They started melting! The water wasn't even hot! So bizarre. I threw them away and cursed myself for paying $7 for fake, crappy berries. I think I'll get some real berries next and try for the last project pictured.

I'll show you pics of all my projects when I finish them. In the meantime, I'm taking suggestions for snack items for my Christmas party... I was planning on making spinach dip, but I'm open to other ideas. Thankfully I don't have to make a ton of food, because all our guests will bring something to share - wine, snacks, etc. I'm also open to cocktail suggestions. :)

How are you decking your halls this year?

<3 Mrs. G

P.S. If you want to see more DIY projects I have up my sleeve, check out my {next projects} board on Pinterest. :)

Thursday, December 1, 2011

Redefining Home: My First Thanksgiving in Minnesota

Hello everyone,

In the spirit of the season, I thought I would take a post to express some gratitude, talk a little about home, and share how I made my first ever Thanksgiving turkey.

Let me begin by saying how thankful I am for my husband. He is still my favorite person in the world, and he knows me better than anyone. Plus, we make an awesome team. He regularly does the dishes and laundry and sometimes even cleans exactly when I need it, but I don't have to tell him. He just knows, and he does it. He also gets up with me every morning at 6 am even though he doesn't need to wake up for another 2 1/2 hours. And he listens to me go on and on about work, sometimes for my entire 40-minute commute home. And yes, sometimes he drives me nuts and occasionally embarrasses me in public, but in our own way, we're perfect for each other, and I wouldn't have it any other way. The longer we're together, the deeper our love grows. Nothing is better than being able to spend every day with your best friend.

Another thing I am thankful for is my wonderful, ever-growing family. Just this past weekend, my brother-in-law got married to a sweet girl who will be a great addition to the family, and my sister-in-law started planning her wedding for next May. I am also super excited to be going home to visit my side of the family over Christmas. I got a little homesick for Nashville on Thanksgiving, and I wasn't able to be there for Christmas last year. It's time to come home.

This brings me to my last point of gratitude - my new home here in Minnesota. "Home" has taken on a new meaning for me since moving away from Nashville last September. I was born there and spent my entire existence in the same house (with the exception of college dorms/apartments) up until my wedding day. I remember how weird it felt that night before - knowing that as soon as I came back from my honeymoon, that room, that bed, and that house would no longer be mine. It would be my parents' home, and even though I would love coming to visit, I would never see it the same way again. Connecticut never felt like home. It was beautiful, and we made some wonderful memories there starting out our marriage, but it was also very lonely. I cried a lot in the beginning, not because I was homesick but because I felt homeless. When we came here to visit in January, I immediately felt what I had been waiting to feel for months in Connecticut - that sense of comfort and belonging. I knew this was where I wanted to live, that this is where my home would really be. Thankfully, God worked it out (in some amazing ways - see my very first post for details), and we were able to move here and finally start a home together. And you know what? I really do love it here (to the shock of my Southern friends and family). I love the snow, the evergreen trees, the outdoor hockey rinks, the corn fields, the Twin Cities, the sports teams (even though most of them suck) and the accents. And I love my little townhouse that I've been decorating with homemade crafts, thrift store finds and IKEA awesomeness. Now that we have our Christmas decorations up, I love it even more. I look forward to buying a nice house someday with Mr. G, but for now, this is perfect. I feel very blessed to call Minnesota my home.


And now for the food! Many thanks to my mother and Mr. G's mother for all the turkey tips. :) I struggled a little at first (my turkey was still frozen on the inside, so my fingers kept going numb trying to find the giblets), but once it was prepared, cooking it was super easy!

Here's my Thanksgiving turkey how-to:


1.  I started by washing and dry patting my turkey, including rinsing out the inside. 

2.  Take out the neck from the top (it's impossible to miss) and the bag of giblets from the bottom. Rinse again. Your turkey should be empty now, like the picture above shows.

3.  Cook for 4 hours at 325 for a 14-lb turkey. See the directions in the package for other sizes. I covered it with foil even though it said not to, because it keeps the turkey from drying out. Keep in mind that if you do this, it usually takes longer to cook than the directions say (mine said 3 - 3 1/2 hours). To make gravy, add a cup of water to the bottom of the roasting pan (again, even though it says not to) and then boil it afterward with flour/corn starch and salt. It's seriously the best gravy I've ever tasted...
 
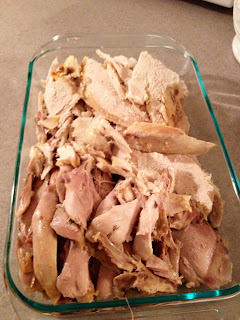
4.  To check if the turkey is done, stick a fork in the leg and see what comes out - if the juice is clear, the turkey's done; if the juice is pink, it's not done. Then carve and serve! Here's how mine came out - I would show you the whole turkey, but Mr. G decided to pull all the skin off of it first, so it turned out looking like something from a horror movie. It still tasted amazing, but if you want a more "picturesque" bird, leave the skin on for photos.


I hope you all had a wonderful Thanksgiving! Feel free to share any family recipes as well as any Christmas crafts you've made. I have a few planned for the weekend... Inspired by Pinterest, of course. ;)

Also, I would love to hear your comments on what "home" means for you. Here's a blog entry that really resonated with me about celebrating the holidays and creating traditions, no matter where you are or who you're with. It makes me even more fuzzy inside that she has a child with special needs, something that has always been close to my heart.

Happy Holidays!

<3 Mrs. G

LinkWithin

Related Posts Plugin for WordPress, Blogger...